• Cursor thickness

    Home » Forums » AskWoody support » Windows » Windows 10 » Questions: Win10 » Cursor thickness

    Author
    Topic
    #2713358

    I have Win 10 Pro version 22H2, updated through last month.

    The cursor (insertion point) thickness on my laptop is abysmally small. I have 20/20 vision (corrected), and have no trouble on my desktop, but I waste a lot of time (and emotional energy) looking for the cursor on my laptop because it’s so very thin, even though it’s not a small laptop.

    Instructions I found online say that there’s a setting at Settings| Accessibility | Text cursor, where there’s a slider to adjust the thickness. Of course, what with MS’s penchant for constantly changing the names of fundamental settings, there is no “Accessibility” on my computer, but I eventually discovered that such a cursor setting can be found under “Ease of Access.”

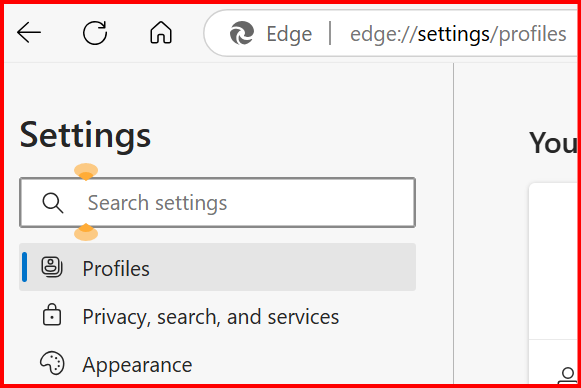
    I increased the thickness to maximum, but the effect has been very limited. It works for some, but not all MS products, and some other apps (such as some, but not all, aspects of my password manager), but it’s ineffective for my word processing programs (WordPerfect and EditPad Pro) and my browsers (Chrome and Firefox — it also doesn’t work for MS Edge).

    Given the nature of things, I’m guessing that Windows has no other setting to affect the cursor thickness, but I have to ask: is there? If so, where is it? And if not, is there any solution? For example, a third party app (for which I would not mind paying a reasonable price). I did a quick Google search, and didn’t find anything.

    Thanks.

    Viewing 6 reply threads
    Author
    Replies
    • #2713360
      1 user thanked author for this post.
      • #2713362

        Terrific!

        I’m about to head out, so I can’t check it out until I get back tonight, but that will be the first thing I do.

        Thanks large.

        • #2713375

          In the Control Panel (this is Win11, but the same is available in Win10)

          Screenshot-2024-10-29-at-3.52.52 PM

          1 user thanked author for this post.
    • #2713393

      The cursor (insertion point) thickness on my laptop is abysmally small.

      I increased the thickness to maximum, but the effect has been very limited.

      Try the Text cursor indicator too:

      This article explains how to make the text cursor easier to see by enabling coloured indicators [and/or by making the cursor thicker].

      How to make the text cursor easier to see in Windows 10

      1 user thanked author for this post.
    • #2713433

      Thanks for all the help. However, I’m not sure that I’ve now got the specific solution that I’m looking for.

      I may not be using the correct terminology to describe the “cursor” thing that I’d like to alter. Unfortunately, I can’t provide a screen shot, because the thing I’m talking about requires the underlying file to be active on the screen, whereas the moment I launch a screen capture app, the app becomes active, which makes the cursor thing disappear. So please bear with me.

      Open any word processing file that has some text typed out. Suppose the text includes the word “computer.” Click between the u and the t in that word. Then, without clicking anywhere else, move the mouse. Wherever you’ve moved the mouse to is indicated by a large capital i shaped thing (a vertical line, with short horizontal bars across both the top and bottom). As best as I can tell, all of the suggestions here affect the size/appearance of that i-shaped thing, but that’s not what I’m concerned with.

      The “insertion point” that I’m concerned with is the thin vertical line that remains between the u and the t. If you go into Settings | Ease of Access | Text cursor, and move the slider for “Change text cursor thicknes,” in an MS Word document that line becomes thicker. But its thickness is not affected in other word processing programs, such as Word Perfect. That’s the insertion point that I’d like to be able to make thicker.

      I appreciate the suggestions here, and if it’s not possible to do what I’ve described, I’ll live with it, because the suggestions are all somewhat helpful. But if there’s a way to thicken that particular insertion point, I’d really like to be able to do it.

      If I’ve missed something, and one of the suggestions actually does do the thing I want, please let me know what I missed. I did look. But if the suggestions to date don’t do the specific thing I’ve now asked about, I’d appreciate advice on whether it’s possible.

      Thanks.

      • #2713438

        I believe the text cursor indicator (coloured blobs above and below the text insertion point cursor) works in all programs. It doesn’t affect the I-shaped mouse cursor.

        • #2748778

          FYI, the custom text cursor indicator does NOT work in all programs. In fact, it does not work in most programs on my system – at least the ones that matter to me the most, including and especially WordPerfect. Just so you know. 🙂

          • #2748848

            Most? Which others, apart from WordPerfect?

            • #2749104

              Hi, B –

              Here are a few:

              The macro editor window in Word (a big one for me, since I often struggle to get my cursor exactly where I want it in the tiny font when editing a long strong).

              Other examples are my PDF editor and Google Docs. Interestingly, it works in Google Spreadsheets but not Google Docs.

              Also, although it works in the main Chrome page, it does not work in some browser pages I access via Chrome, such as (1) some private/paid discussion group (works in some, not in others), (2) this forum.

              I should stand correct, though, in my assessment that it does not work in “most” programs on my system. When I was going through and trying to create this list for you, I opened up as many apps and windows as I could think of and checked to see if the cursor worked, just to be able to make the list. Proportionally speaking, it’s probably fair to say it works in more programs than it doesn’t, maybe even going so far as to say “works in most programs.” But it’s still annoying and mystifying that it doesn’t work in all programs.

              An option to override Windows settings would be fine, but I’m often puzzled why an app that is designed to work on Windows does not conform to parent-level Windows settings by default. Grr!

              EDITED TO ADD: I think this particular comment warrants further clarification. In one sense, you are technically correct that the Windows text cursor works in all programs in the sense that in all programs, you do see the very thin blinking vertical bar. But I think what Bob is referring to, and what I was also specifically referring to in my comment, is the custom cursor you can activate via Ease of Access – making it bigger, thicker, with or without the horizontal bars above and below (I-shaped), and a custom color of your choice. That is the feature that does not work in all programs. Ironically, the custom mouse cursor *does* work 100 percent across all Windows apps but not the custom text cursor, which is so sad!

            • #2749251

              Going on memory (it’s been a year), my text editor, my pdf editor and any of the three browsers on my computer (which includes MS Edge, which I don’t use, but checked back when I started this thread).

            • #2749286

              Bob, did you see my response to you on 2/16 about how to improve the cursor appearance in WordPerfect? The cosmetics of the response are a little wonky because I accidentally quoted one of your entire previous posts, and then a portion of it again a paragraph later. Sorry about that! But if you’re still using WordPerfect on your laptop, hopefully, it will help. -Karen 🙂

              1 user thanked author for this post.
            • #2749353

              No, I missed it.

              I’ve now made the changes in WP that you suggested, and you’re right: they definitely improve things.

              Life was good, and it just got better. (Hey, I’m retired. What’s to complain about in a serious way, until a wildfire gets me?)

              Thanks large!

      • #2748779

        Thanks for all the help. However, I’m not sure that I’ve now got the specific solution that I’m looking for.

        I may not be using the correct terminology to describe the “cursor” thing that I’d like to alter. Unfortunately, I can’t provide a screen shot, because the thing I’m talking about requires the underlying file to be active on the screen, whereas the moment I launch a screen capture app, the app becomes active, which makes the cursor thing disappear. So please bear with me.

        Open any word processing file that has some text typed out. Suppose the text includes the word “computer.” Click between the u and the t in that word. Then, without clicking anywhere else, move the mouse. Wherever you’ve moved the mouse to is indicated by a large capital i shaped thing (a vertical line, with short horizontal bars across both the top and bottom). As best as I can tell, all of the suggestions here affect the size/appearance of that i-shaped thing, but that’s not what I’m concerned with.

        The “insertion point” that I’m concerned with is the thin vertical line that remains between the u and the t. If you go into Settings | Ease of Access | Text cursor, and move the slider for “Change text cursor thicknes,” in an MS Word document that line becomes thicker. But its thickness is not affected in other word processing programs, such as Word Perfect. That’s the insertion point that I’d like to be able to make thicker.

        I appreciate the suggestions here, and if it’s not possible to do what I’ve described, I’ll live with it, because the suggestions are all somewhat helpful. But if there’s a way to thicken that particular insertion point, I’d really like to be able to do it.

        If I’ve missed something, and one of the suggestions actually does do the thing I want, please let me know what I missed. I did look. But if the suggestions to date don’t do the specific thing I’ve now asked about, I’d appreciate advice on whether it’s possible.

        Thanks.

        Bob, I feel your pain! I do 100% of my work in WordPerfect these days, and although I have the pleasant luxury of using three large desktop monitors, I still often struggle to (1) see where my text cursor is in the moment and (2) position my cursor exactly where I want it between two characters.

        It would certainly be nice if WordPerfect conformed to *all* of our personalized Windows settings. But I have at least found a reasonable workaround that I’m happy with, and in certain instances, actually works better because of the “snap to” feature in WP. Maybe this will work for your purposes as well:

        1. Optionally, in the Windows Ease of Access/Mouse settings, change your Mouse Pointer color (I suggest red via “Pick a custom pointer color”). Also optionally change your pointer size. Click on very beginning of the Change Pointer Size line and arrow over once until it says “2.” This will make your mouse easier to follow. Also, changing it to the same color as your text cursor as it moves will also be helpful, IMO.
        2. In WP, click on Tools, Settings, Display.
        3. Change the Shadow Cursor color to the color of your choice (I suggest red).
        4. In the Shape column, select the first shape at the top of the right column.
        5. In the Snap To section, select Spaces.
        6. In the Active section, select Both.
        7. Turn on your Shadow Cursor (View Menu, Shadow Cursor).

        Now click anywhere on a line of text. Then hover and move your mouse pointer in the white space just below the text (not directly over the text), and notice how you can now easily follow where your text cursor is. When the cursor is between the two characters where you want it to be, without having to hover right on top of the word, you can now just click your mouse, and your cursor will be between

        The “insertion point” that I’m concerned with is the thin vertical line that remains between the u and the t. I

        the two characters.

        Sadly, the colored text cursor only stays colored as you’re moving your mouse. When you stop, it reverts to black. But it will now be easier to get the cursor where you want it, and that’s better than nothing.

        I hope this makes sense and is helpful!

        Karen S 🙂

        1 user thanked author for this post.
    • #2713451

      The blinking cursor indicating typing position has been a problem for me for years. I just press a key to see where things happen.

      cheers, Paul

    • #2713452

      Unfortunately, I can’t provide a screen shot, because the thing I’m talking about requires the underlying file to be active on the screen, whereas the moment I launch a screen capture app, the app becomes active, which makes the cursor thing disappear.

      In place of a screen capture, try taking a close up picture with you phone and attaching the image in this thread.

      Desktop mobo Asus TUF X299 Mark 1, CPU: Intel Core i7-7820X Skylake-X 8-Core 3.6 GHz, RAM: 32GB, GPU: Nvidia GTX 1050 Ti 4GB. Display: Four 27" 1080p screens 2 over 2 quad.
      1 user thanked author for this post.
    • #2713454

      I can’t provide a screen shot

      Have you tried Snip & Sketch, New > Snip in 3/10 seconds?

      cheers, Paul

      1 user thanked author for this post.
      • #2713540

        I haven’t been able to do that.

        I have both Snip & Sketch and a text file open, with the text file active. The moment I press Alt + Tab in order to use S&S, the insertion point disappears from the text file. I encounter the same problem with both Word Perfect and EditPad Pro.

        Am I doing something wrong? If so, what’s the correct way to keep the text file active while using S&S in order to get the screen shot?

      • #2713551

        Ah, thanks for that suggestion.

        Two photos are attached: one for Word Perfect and the other for Word.

        Each photo shows two different things that (right or wrong) I’ve seen referred to as a “cursor” over the years. In the Word Perfect attachment, there’s a green arrow (which follows the movement of the mouse) and a thin vertical line between o and i in the word “point” (it appears where I last clicked inside the active document). In the Word attachment, there’s a large green “I” and vertical line (thicker this time) between the o and the i.

        The vertical line between the o and the i is the thing that I want to make thicker. As you can see, it is thicker in the Word file, because I adjusted the setting in Windows Settings | Ease of Access | Text cursor | Change text cursor appearance. (I made it thicker than I actually need for normal usage, because I wanted it to be especially prominent in the photo.) Changing that setting affects only Word, and not Word Perfect. Same in the case of Notepad vs. EditPad Pro: changing the setting affects only the former, and not the latter. In short, the setting affects only MS apps (and not all of them, by the way).

        What I’d like to do, if possible, is make it thicker in non-MS apps as well.

        Thanks for the help.

    • #2713541

      The “insertion point” that I’m concerned with is the thin vertical line that remains between the u and the t. If you go into Settings | Ease of Access | Text cursor, and move the slider for “Change text cursor thicknes,” in an MS Word document that line becomes thicker. But its thickness is not affected in other word processing programs, such as Word Perfect. That’s the insertion point that I’d like to be able to make thicker.

      Changing the cursor thickness does change in other word processing programs such WordPad or NotePad.  Since the cursor indicator and the cursor thickness settings don’t work in Word Perfect, Word Perfect uses its own settings for these items and no Windows setting is going to affect it.  The change you look for will have to come from Word Perfect as it is not even loading the Windows settings for these display items.

      Unfortunately, I can’t provide a screen shot, because the thing I’m talking about requires the underlying file to be active on the screen, whereas the moment I launch a screen capture app, the app becomes active, which makes the cursor thing disappear. So please bear with me.

      From your comments you have Word?  If so Word can take the screenshot you want.

      Minimize any other active apps.
      Have the app with the screenshot you want displayed and active.
      Open a blank Word document.
      Press and release each of the following keys in order listed:
      Alt, N, S, C, C
      This will activate Word’s screenshot function which cause the current Word document to disappear and the last active window on the Desktop will now be active for your screenshot. The screen will grey out with a + icon for you to create a box of the area to be captured by holding the mouse button down and dragging diagonally. Because Word takes a screenshot of an active window it will capture your cursor.

      HTH, Dana:))

      1 user thanked author for this post.
      • #2713555

        The Windows setting doesn’t work for all MS apps either. For example, it doesn’t affect things in Edge, whether in the address bar, in Google searches or, I assume, when filling in forms (though I haven’t tried that last one, since I never use Edge, anyway).

        I tried the Word screenshot feature just now, and it worked fine, so I have that for future reference.

        Thanks for the advice.

    Viewing 6 reply threads
    Reply To: Reply #2749353 in Cursor thickness

    You can use BBCodes to format your content.
    Your account can't use all available BBCodes, they will be stripped before saving.

    Your information:


    Cancel