
|
Patch reliability is unclear, but widespread attacks make patching prudent. Go ahead and patch, but watch out for potential problems. |
In this issue BEST UTILITIES: Freeware Spotlight — Preparing your PC for Windows 11 Additional articles in the PLUS issue LANGALIST: Question from “a Clueless OneDrive User” MICROSOFT 365: All the stuff to use or ignore in Teams PATCH WATCH: Time to block vNext Not a Plus Member yet? Join today!
BEST UTILITIES Freeware Spotlight — Preparing your PC for Windows 11
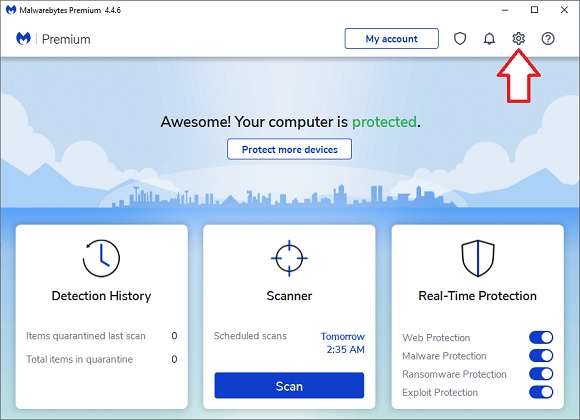
By Deanna McElveen Nothing can ruin the excitement of a major Windows upgrade like an error message halfway through installation. You know — that pit in your stomach when you don’t know if you now have your old Windows or the new Windows. Are you stuck on a transitional plane? Have you created a half-breed, mutant operating system? Are your personal files gone!!? Let’s try to prevent all that with some good old-fashioned housecleaning before you are offered Windows 11 this month. First thing on our list is checking for malware. This is first because nothing will screw up a Windows upgrade like hidden malware. Not to mention that it can also severely hamper the other tasks we have on our cleaning list today. The first anti-malware scan we are going to run is the daddy of all malware scanners, Malwarebytes. Go grab a copy from OlderGeeks.com, and install it on your computer. When you install Malwarebytes, you will notice it’s a 14-day trial of Malwarebytes Premium. If you don’t buy it within 14 days, it will revert to the free version. The free version doesn’t protect your computer in real time but does allow you to scan for and remove malware. Also, you will be offered the free Malwarebytes Browser Guard. It’s a great, extra level of protection, but click skip if you don’t want it. Before you hit that scan button, we’re going to make one quick settings change. Click the little gear in the top right-hand corner (Figure 1).
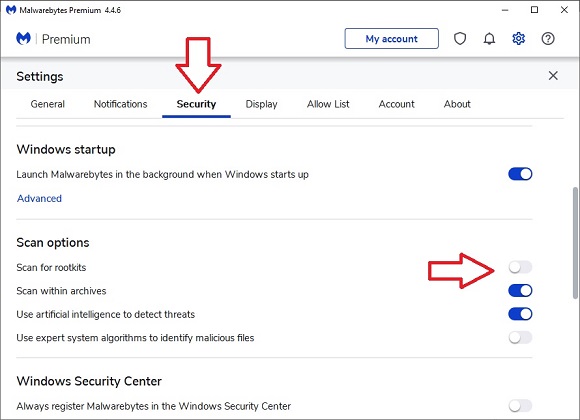
Now click the Security tab and scroll down to Scan options (Figure 2). Click the switch to the right of Scan for rootkits to enable it. Click the settings gear again to return to the main window. What are rootkits? Well, there are several types, but in a nutshell: it’s a program designed to hide malware from detection. Think of it as an invisibility cloak for malicious software. Why does Malwarebytes not have it turned on by default? That’s a very good question — for which I have no answer.
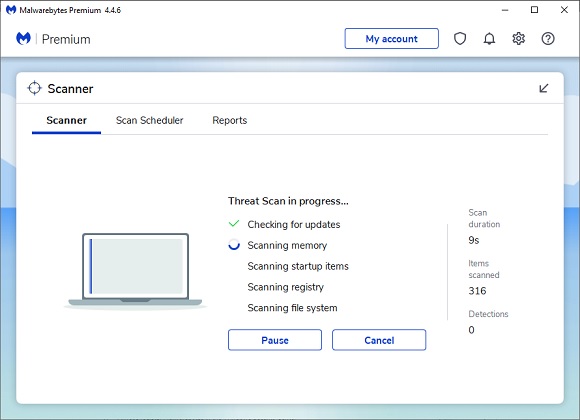
Back on the main window (Figure 1), click Scan at the bottom and wait for Malwarebytes to scan your system (Figure 3). If it finds anything, it will offer to remove it. Let it.
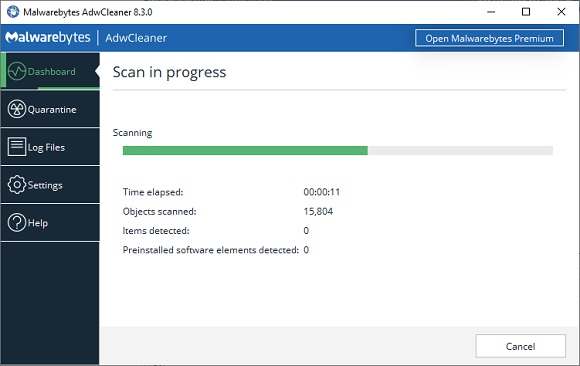
The next tool we are going to use is also made by Malwarebytes. It’s called Malwarebytes AdwCleaner. This program focuses on items that are not necessarily malware but rather other annoying things such as adware, junkware, and spyware. Again, download it from OlderGeeks.com. This one is portable so there’s no need to install it. Just run the file you download. There are no settings to adjust — just click Scan Now (Figure 4).
Once the scan is finished, let AdwCleaner remove whatever it finds.
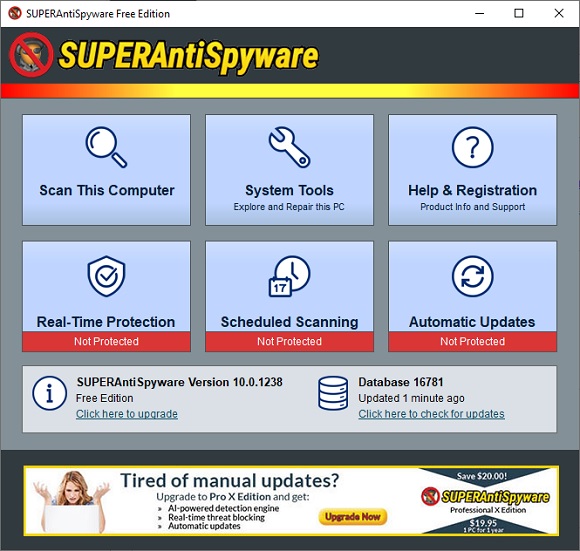
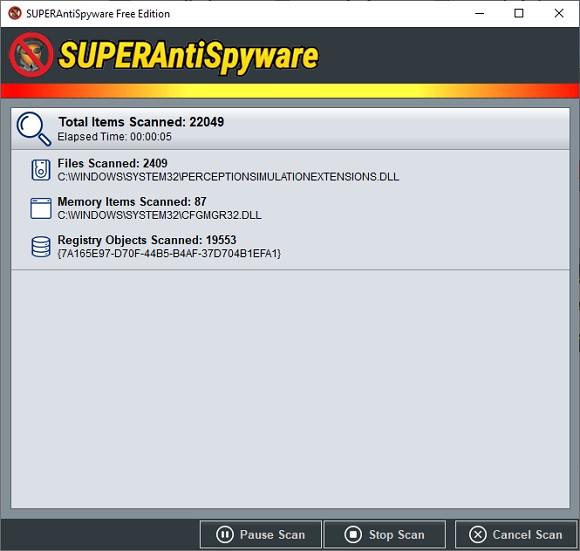
The third tool we are going to run is a great “second-opinion scanner” — it has a knack for finding unwanted things that other scanners (even Malwarebytes) tend to miss. That’s why SUPERAntiSpyware is always in my bag of tricks. Download it from OlderGeeks.com. You will need to install this one; it’s not portable. Nothing complicated about SUPERAntiSpyware. Just click Scan This Computer, choose Complete Scan, and let it do its thing (Figure 6).
The scan won’t take too long. Just as with the previous programs, let SUPERrAntiSpyware remove whatever it finds (Figure 7).
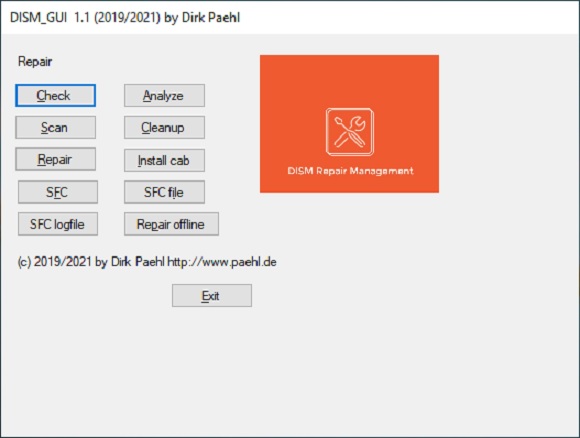
Now that we are done with our one-two-three punch of malware removal, let’s check for and clean up any system corruption — another major cause of Windows upgrades going south. Windows includes the tools we already need for fixing system corruption, but they are used through the Windows Command Line. Who wants to do all that nerdy typing? Let’s use a great tool to do the Command Line stuff for us — one we’ve talked about before. Download DISM_GUI from OlderGeeks.com if you don’t still have it from the last time we discussed it. It’s portable, so just unzip it. The file uses the .7z file format, so use 7-Zip to unzip it, then fire it up (Figure 8). Computer techs, this one needs to be on your flash drive.
The only two buttons we will be using today are, in this order, SFC and then Repair. SFC (short for System File Checker) will scan for corrupted Windows system files and replace them from backups if possible. Go ahead and click the SFC button, and go grab a snack — the scan will take several minutes (Figure 9).
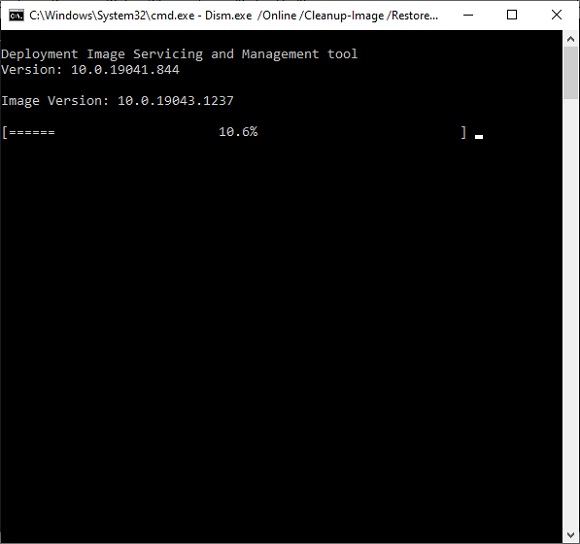
After the scan is complete, SFC will tell you whether it found any corrupted files. If it says it fixed all of them, you are good to go. If SFC says it could not fix some of them, no worries: that is what the next button is for. Either way, and before moving on, restart your computer. We’ll wait. If some files could not be repaired by SFC, click the Repair button next. Repair runs the DISM (Deployment Image Servicing and Management) RestoreHealth command (Figure 10). This repairs system files that SFC could not fix, by grabbing the files from Microsoft’s servers if needed. Make sure you have an active Internet connection when you run DISM (Repair button), or it won’t be able to get the files it needs.
DISM will simply tell you upon completion whether it was successful. Again, restart your computer. The last housecleaning task we need to do before installing Windows 11 smoothly will involve some research on your part. We need to update drivers, firmware, and the BIOS. If you have a name-brand computer, most of the major manufacturers have utilities which will do this job for you. If you do not already have such a utility installed, you can probably download it from your computer manufacturer’s website. I made a quick list of these programs (or, download pages if there is no utility) to check your computer for driver updates. If you have one of these programs installed, run it and let it update your drivers, firmware, and BIOS.
If you have a custom-built computer, you will want to look at the motherboard in your computer and write down its manufacturer and model. Visit the manufacturer’s website for driver updates or driver update utilities. The same goes for video cards in your system, or for video cards you have added to a name-brand computer. Motherboards Graphics cards One more thing, and I cannot stress this enough: Antivirus programs, when active, can severely rain on your parade when you are doing things such as driver updates, BIOS updates, and Windows upgrades. Turn your AV program off while doing these things. You can usually do this by right-clicking the AV program’s icon in the Notification Area in the Windows System Tray next to the time and date (bottom right of your screen). Once the updates are done, re-enable the AV program and run a manual scan, just to be on the safe side. Happy computing!
Deanna and Randy McElveen are celebrating over a decade running OlderGeeks.com, over two decades in the computer business, and even more than that putting up with each other. Their computer store is in a small town in the Missouri Ozarks. Believing that happy customers are always the best advertisement, they hope to squeeze in a couple more decades doing the same.
You’re welcome to share! Do you know someone who would benefit from the information in this newsletter? Feel free to forward it to them. And encourage them to subscribe via our online signup form — it’s completely free!
Publisher: AskWoody Tech LLC (sb@askwoody.com); editor: Will Fastie (editor@askwoody.com). Trademarks: Microsoft and Windows are registered trademarks of Microsoft Corporation. AskWoody, Windows Secrets Newsletter, WindowsSecrets.com, WinFind, Windows Gizmos, Security Baseline, Perimeter Scan, Wacky Web Week, the Windows Secrets Logo Design (W, S or road, and Star), and the slogan Everything Microsoft Forgot to Mention all are trademarks and service marks of AskWoody Tech LLC. All other marks are the trademarks or service marks of their respective owners. Your subscription:
Copyright © 2021 AskWoody Tech LLC. All rights reserved. |


Plus Membership
Donations from Plus members keep this site going. You can identify the people who support AskWoody by the Plus badge on their avatars.
AskWoody Plus members not only get access to all of the contents of this site -- including Susan Bradley's frequently updated Patch Watch listing -- they also receive weekly AskWoody Plus Newsletters (formerly Windows Secrets Newsletter) and AskWoody Plus Alerts, emails when there are important breaking developments.
Get Plus!
Recent Topics
-
Add serial device in Windows 11
by 2 hours, 58 minutes ago
-
Windows 11 users reportedly losing data due forced BitLocker encryption
by 3 hours, 58 minutes ago
-
Cached credentials is not a new bug
by 7 hours, 32 minutes ago
-
Win11 24H4 Slow!
by 7 hours, 43 minutes ago
-
Microsoft hiking XBox prices starting today due to Trump’s tariffs
by 4 hours, 54 minutes ago
-
Asus adds “movement sensor” to their Graphics cards
by 9 hours, 53 minutes ago
-
‘Minority Report’ coming to NYC
by 6 hours, 13 minutes ago
-
Apple notifies new victims of spyware attacks across the world
by 18 hours, 35 minutes ago
-
Tracking content block list GONE in Firefox 138
by 17 hours, 59 minutes ago
-
How do I migrate Password Managers
by 1 hour, 49 minutes ago
-
Orb : how fast is my Internet connection
by 3 hours, 38 minutes ago
-
Solid color background slows Windows 7 login
by 1 day, 6 hours ago
-
Windows 11, version 24H2 might not download via Windows Server Updates Services
by 1 day, 4 hours ago
-
Security fixes for Firefox
by 5 hours, 13 minutes ago
-
Notice on termination of services of LG Mobile Phone Software Updates
by 1 day, 16 hours ago
-
Update your Apple Devices Wormable Zero-Click Remote Code Execution in AirPlay..
by 2 days, 2 hours ago
-
Amazon denies it had plans to be clear about consumer tariff costs
by 1 day, 17 hours ago
-
Return of the brain dead FF sidebar
by 1 day, 4 hours ago
-
Windows Settings Managed by your Organization
by 7 hours, 17 minutes ago
-
Securing Laptop for Trustee Administrattor
by 3 hours, 42 minutes ago
-
The local account tax
by 1 day, 5 hours ago
-
Recall is back with KB5055627(OS Build 26100.3915) Preview
by 2 days, 15 hours ago
-
Digital TV Antenna Recommendation
by 2 days, 7 hours ago
-
Server 2019 Domain Controllers broken by updates
by 3 days, 2 hours ago
-
Google won’t remove 3rd party cookies in Chrome as promised
by 3 days, 4 hours ago
-
Microsoft Manager Says macOS Is Better Than Windows 11
by 3 days, 7 hours ago
-
Outlook (NEW) Getting really Pushy
by 2 days, 10 hours ago
-
Steps to take before updating to 24H2
by 8 hours, 9 minutes ago
-
Which Web browser is the most secure for 2025?
by 2 days, 14 hours ago
-
Replacing Skype
by 2 days, 3 hours ago
Remembering Woody
